How to Propagate Spider Plant: The Easiest Houseplant
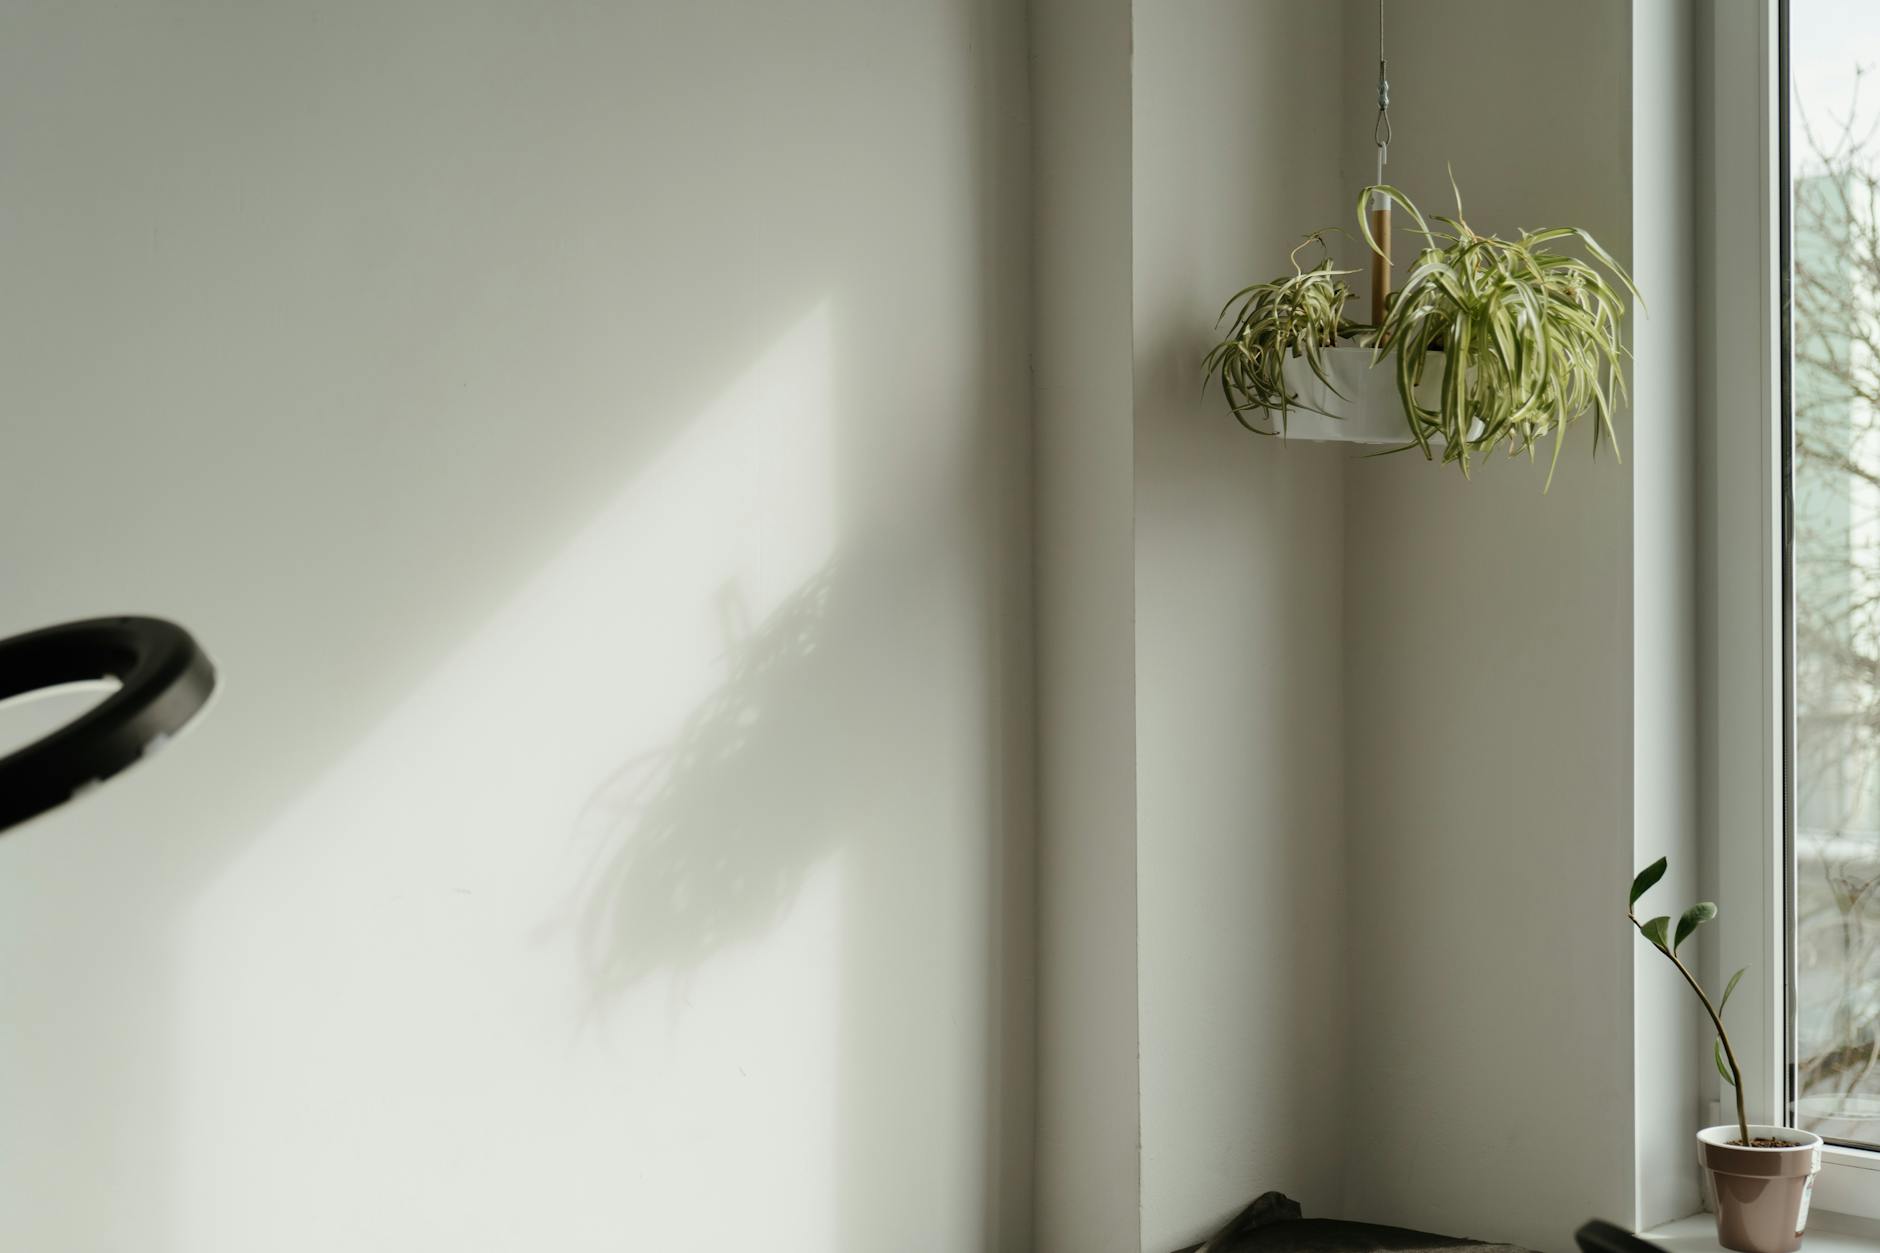
An established spider plant growing near a bright window will eventually extend several long, arching stems outward from its centre. At the tips of those stems hang small plantlets — exact miniatures of the parent plant, already with leaves formed and sometimes with short aerial roots visible at their base. These plantlets (spiderettes) are produced continuously by healthy Chlorophytum comosum throughout the year, and propagating from them is among the simplest processes in houseplant care: the plant has already done most of the work before you intervene.
How to propagate Spider Plant — quick overview
- Spiderette propagation: Remove baby plants from the hanging stolons and root them in water or soil. The fastest and most straightforward method. Suitable for any grower.
- Water rooting of spiderettes: Lower a spiderette still attached to the parent plant into a small jar of water until it roots, then cut. Reduces transplant stress.
- Division: Separate the main plant’s root ball into multiple sections at repotting time. Produces large, established plants immediately but requires a mature parent.
Method 1: Spiderette propagation in soil (most common)
Spiderettes are ready to remove when they have at least 4–5 small leaves and, ideally, visible aerial root nubs at their base — small protrusions or brownish bumps from which roots will develop.
- Identify a mature spiderette. Young spiderettes (1–2cm across) are too small to root reliably. Wait until a spiderette is at least 3–4cm across and has several distinct leaves.
- Cut the stolon (the connecting stem between parent and spiderette) close to the spiderette using clean scissors. You can either remove the spiderette entirely before rooting or leave it attached during rooting (see Method 2 below).
- Prepare a small pot (6–8cm diameter) with damp, well-draining potting mix. Spider plants are not demanding about soil composition — any standard indoor mix works.
- Plant the spiderette at the same depth it sat on the stolon. Press the base into the soil so that any visible root nubs are covered with 1–2cm of mix.
- Keep the soil consistently moist — check every 2–3 days. Spider plants do not tolerate drying out during the rooting phase.
- Place in medium to bright indirect light.
- The spiderette has rooted when it shows resistance to a gentle tug and begins producing new, slightly larger leaves — typically 1–2 weeks.
Method 2: Water-assisted rooting (still attached to parent)
This method roots the spiderette before cutting, which reduces transplant stress and produces a more established plantlet at the point of separation.
- While the spiderette is still attached to the parent plant by its stolon, position a small glass or jar of water beneath it.
- Lower the spiderette into the water so its base is submerged — the stolon should be long enough to reach the water container while the parent plant sits on its normal surface. Use a book or another pot to raise the water container if needed.
- Secure the setup so it won’t tip. Leave for 1–2 weeks.
- Check weekly — roots emerge from the base of the spiderette into the water.
- Once roots are 2–3cm long, cut the stolon close to the spiderette and transfer immediately to a pot of moist potting mix. Do not leave water-rooted spiderettes in water for more than 3–4 weeks; long water roots struggle more during the soil transition.
Method 3: Division (for large, mature plants)
Division produces the fastest route to a well-sized new spider plant, because each division arrives with an established leaf structure and root system. It works best when the parent plant has become pot-bound — visibly too large for its container with roots circling the base.
- Water the plant thoroughly 1–2 days before dividing. Hydrated roots are more pliable and less likely to break during separation.
- Remove the plant from its pot and gently work the root ball apart with your fingers. Identify natural divisions — points where separate crowns of leaves emerge from distinct root clusters.
- Separate the crowns by pulling gently or cutting where necessary with a clean knife.
- Each division needs at least 3–4 leaves and a functional root system.
- Pot each division immediately in fresh potting mix. Choose a pot sized for the root ball — 2–3cm clearance around the roots.
- Water well and keep in indirect light for 2–3 weeks while the root system recovers. Some leaf wilting in the first week is normal and temporary.
When is the best time to propagate Spider Plant?
Anytime. Chlorophytum comosum is among the few houseplants that propagates successfully throughout the year in typical indoor conditions. Spiderettes are produced continuously, not just in spring, and rooting occurs within 1–2 weeks regardless of season.
That said, spring and summer produce the fastest results for both spiderette rooting and division. Spiderettes started in April root in 7–10 days; those started in December may take 14–18 days. Division performed in spring gives the new plant a full growing season to develop before autumn.
Winter division is not recommended for large divisions — root shock combined with slower winter growth means that plants divided in November or December may take until March to fully recover. Spiderette propagation works fine year-round.
How long does propagation take?
| Method | Rooting | New leaf visible | Established |
|---|---|---|---|
| Spiderette in soil | 1–2 weeks | 2–4 weeks | 4–8 weeks |
| Water-rooted spiderette | 1–2 weeks in water, then 1–2 weeks in soil | 3–5 weeks | 5–8 weeks |
| Division | 2–3 weeks (recovery) | 3–4 weeks | 6–10 weeks |
Spider plants are relatively fast-developing once established. A rooted spiderette in a 6cm pot typically needs repotting to a 10cm pot within 3–4 months.
Common propagation problems
Spiderette goes limp and yellows after planting: The most common issue with newly separated spiderettes. Caused by drying out during the rooting phase, or by rooting too early (the spiderette was too small). Keep the soil consistently moist — slightly more than you would for an established plant — until roots are established. If the spiderette was very small (under 2cm) when removed, it may struggle to survive independently; next time, wait for larger, more developed plantlets.
No roots after 3 weeks: Check that the spiderette was not simply resting on the soil surface without its base in contact with the mix. Spider plants root from their base — if the spiderette was sitting above the soil rather than pressed into it, it will not root. Replant with the base firmly in contact with the soil.
Spiderette leaves turning brown at the tips: Usually low humidity combined with the stress of rooting. Increase watering frequency and mist the leaves lightly until the plant has established roots and can regulate its own moisture more effectively.
Division wilting and not recovering after 2 weeks: Divisions experience root shock; wilting for the first 5–7 days is normal. If wilting continues beyond 2 weeks, check whether the soil is consistently moist — underwatering during recovery is the most common cause of prolonged wilt. Also check that the division was not split into too small a section; divisions with fewer than 3 leaves and a very limited root system struggle to recover.
How to care for newly propagated Spider Plant
Spider plants are among the least demanding plants to bring through the post-propagation phase:
- Watering: Keep the soil consistently moist for the first 4–6 weeks while the root system develops. After that, transition to the normal spider plant watering schedule: when the top 2–3cm of soil dries out.
- Light: Bright, indirect light produces the fastest growth. Avoid direct sun on newly rooted plants — the leaves can scorch before the root system is strong enough to compensate.
- Fertilising: Begin monthly feeding with a diluted balanced fertiliser once the plant has been growing steadily for 6–8 weeks in its new pot.
- When to expect spiderettes: A newly propagated spider plant will not produce its own spiderettes until it reaches a certain size and maturity — typically 12–18 months from a small spiderette, or 6–12 months from a division. This is normal and not a sign of poor health.
- Pet safety: Spider plants are non-toxic to cats, dogs, and horses — relevant when deciding where to place hanging baskets of spiderettes within a home with animals.
For full care guidance, see the Spider Plant care guide.
Frequently asked questions
Can I propagate Spider Plant without any equipment? Yes. You need a small container (any waterproof pot), damp soil (any houseplant mix), and water. Nothing else is required. No rooting hormone, no humidity tents, no grow lights. The spider plant does most of the work.
How small is too small for a spiderette to remove? A spiderette under 2cm across (measured leaf-tip to leaf-tip) is too small to reliably survive independent rooting. The optimal size is 3–5cm across with visible root nubs at the base. At this size, rooting in soil typically takes 7–10 days.
Should I remove spiderettes from the parent plant even if I don’t want to propagate? Yes. Producing spiderettes requires energy from the parent plant. Removing them periodically — even if you don’t want new plants — redirects that energy back into the parent’s foliage and root development, producing a larger and denser main plant.
Do all spider plant cultivars propagate the same way? Yes. The propagation method is identical for the plain green form, the variegated ‘Vittatum’, and the reverse-variegated ‘Bonnie’. Variegated forms bred from variegated parents will produce variegated spiderettes — the variegation is stable and passes reliably to new plants.